Onboarding tenant using SaaS admin application
Lab 2’s deployed sample solution supports two separate flows for onboarding tenants. The first one is triggered from the SaaS Admin application.
Just like in Lab 1, the last line of the deployment script contains the URL to the sample App.
dist/index.html                  0.45 KiB
...
upload: dist/assets/index.7eedae2b.css to s3://serverless-saas-fauna-userinterfa...
upload: dist/assets/index.9e075f0e.js to s3://serverless-saas-fauna-userinterfac...
Completed configuring environment for Admin Client
Successfully completed deploying Admin UI
Admin site URL: https://dqsb7cy5638m1.cloudfront.net-
Copy the URL from the terminal (where you ran the ./deployment.sh script) and open it in a browser.
-
Then, click on Sign in at the top right corner to display the sign in modal. An admin user was provisioned by the deployment script. The username is admin-user. Also, recall that when you deployed the application earlier in this process, you provided an email address. Check your email and find the temporary password that was sent to that address.
Log-in with username admin-user and the temporary password:

When you sign in with the password that was emailed to you, you should be prompted to set your own password. Go ahead and complete the process.
-
Once logged in, navigate to the Tenant tab, then click Provision Tenant and fill in the form.
- Enter “tenant1” as the Tenant Name
- Provide an actual email address where you would be able to receive messages.
- Address and Phone number can just be dummy values.
- Pick any Service plan.
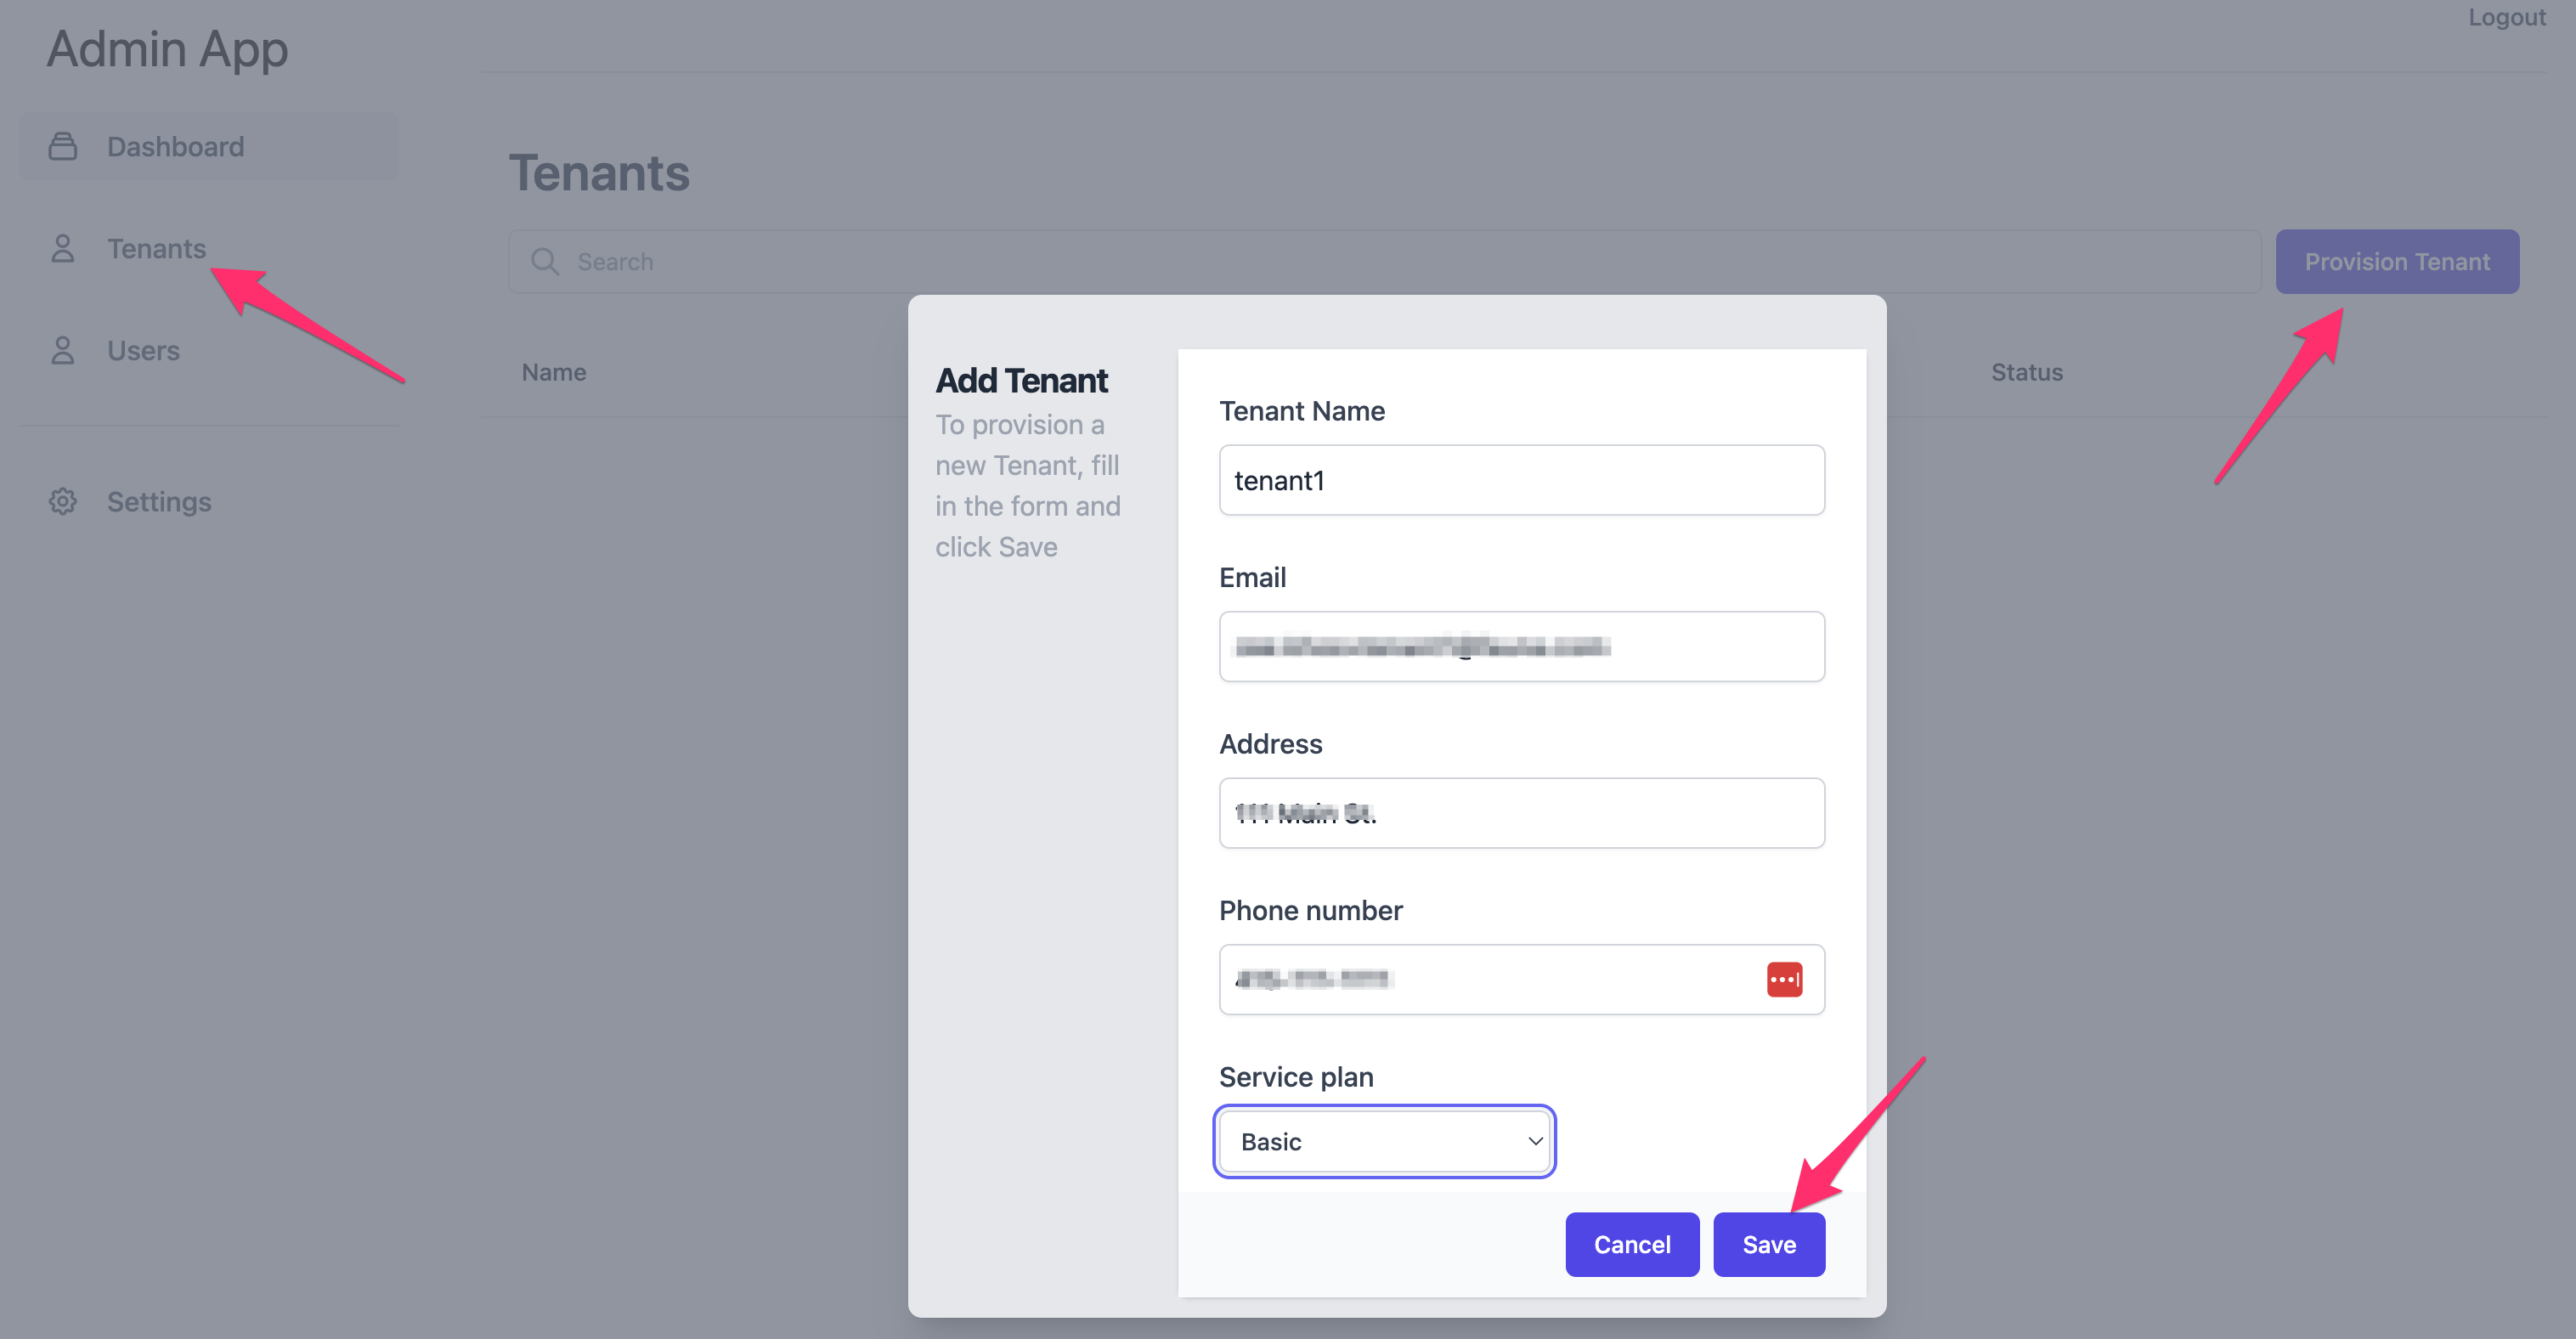
Click Save to create the tenant. If all goes well, the modal should automatically close and the tenant you added should appear in the list tenants view. Proceed to the next section.