Own workstation setup
If you completed the previous section and are using the Cloud9 IDE, skip this part and head over to the Lab1.
Local workstation setup
For local development (i.e. you’re not using Cloud9), ensure that you have the following installed:
- Docker
- Node 16 or greater
- Python 3.9 or greater
- AWS CLI
- AWS SAM CLI
- jq
- pylint
AWS Profile setup
-
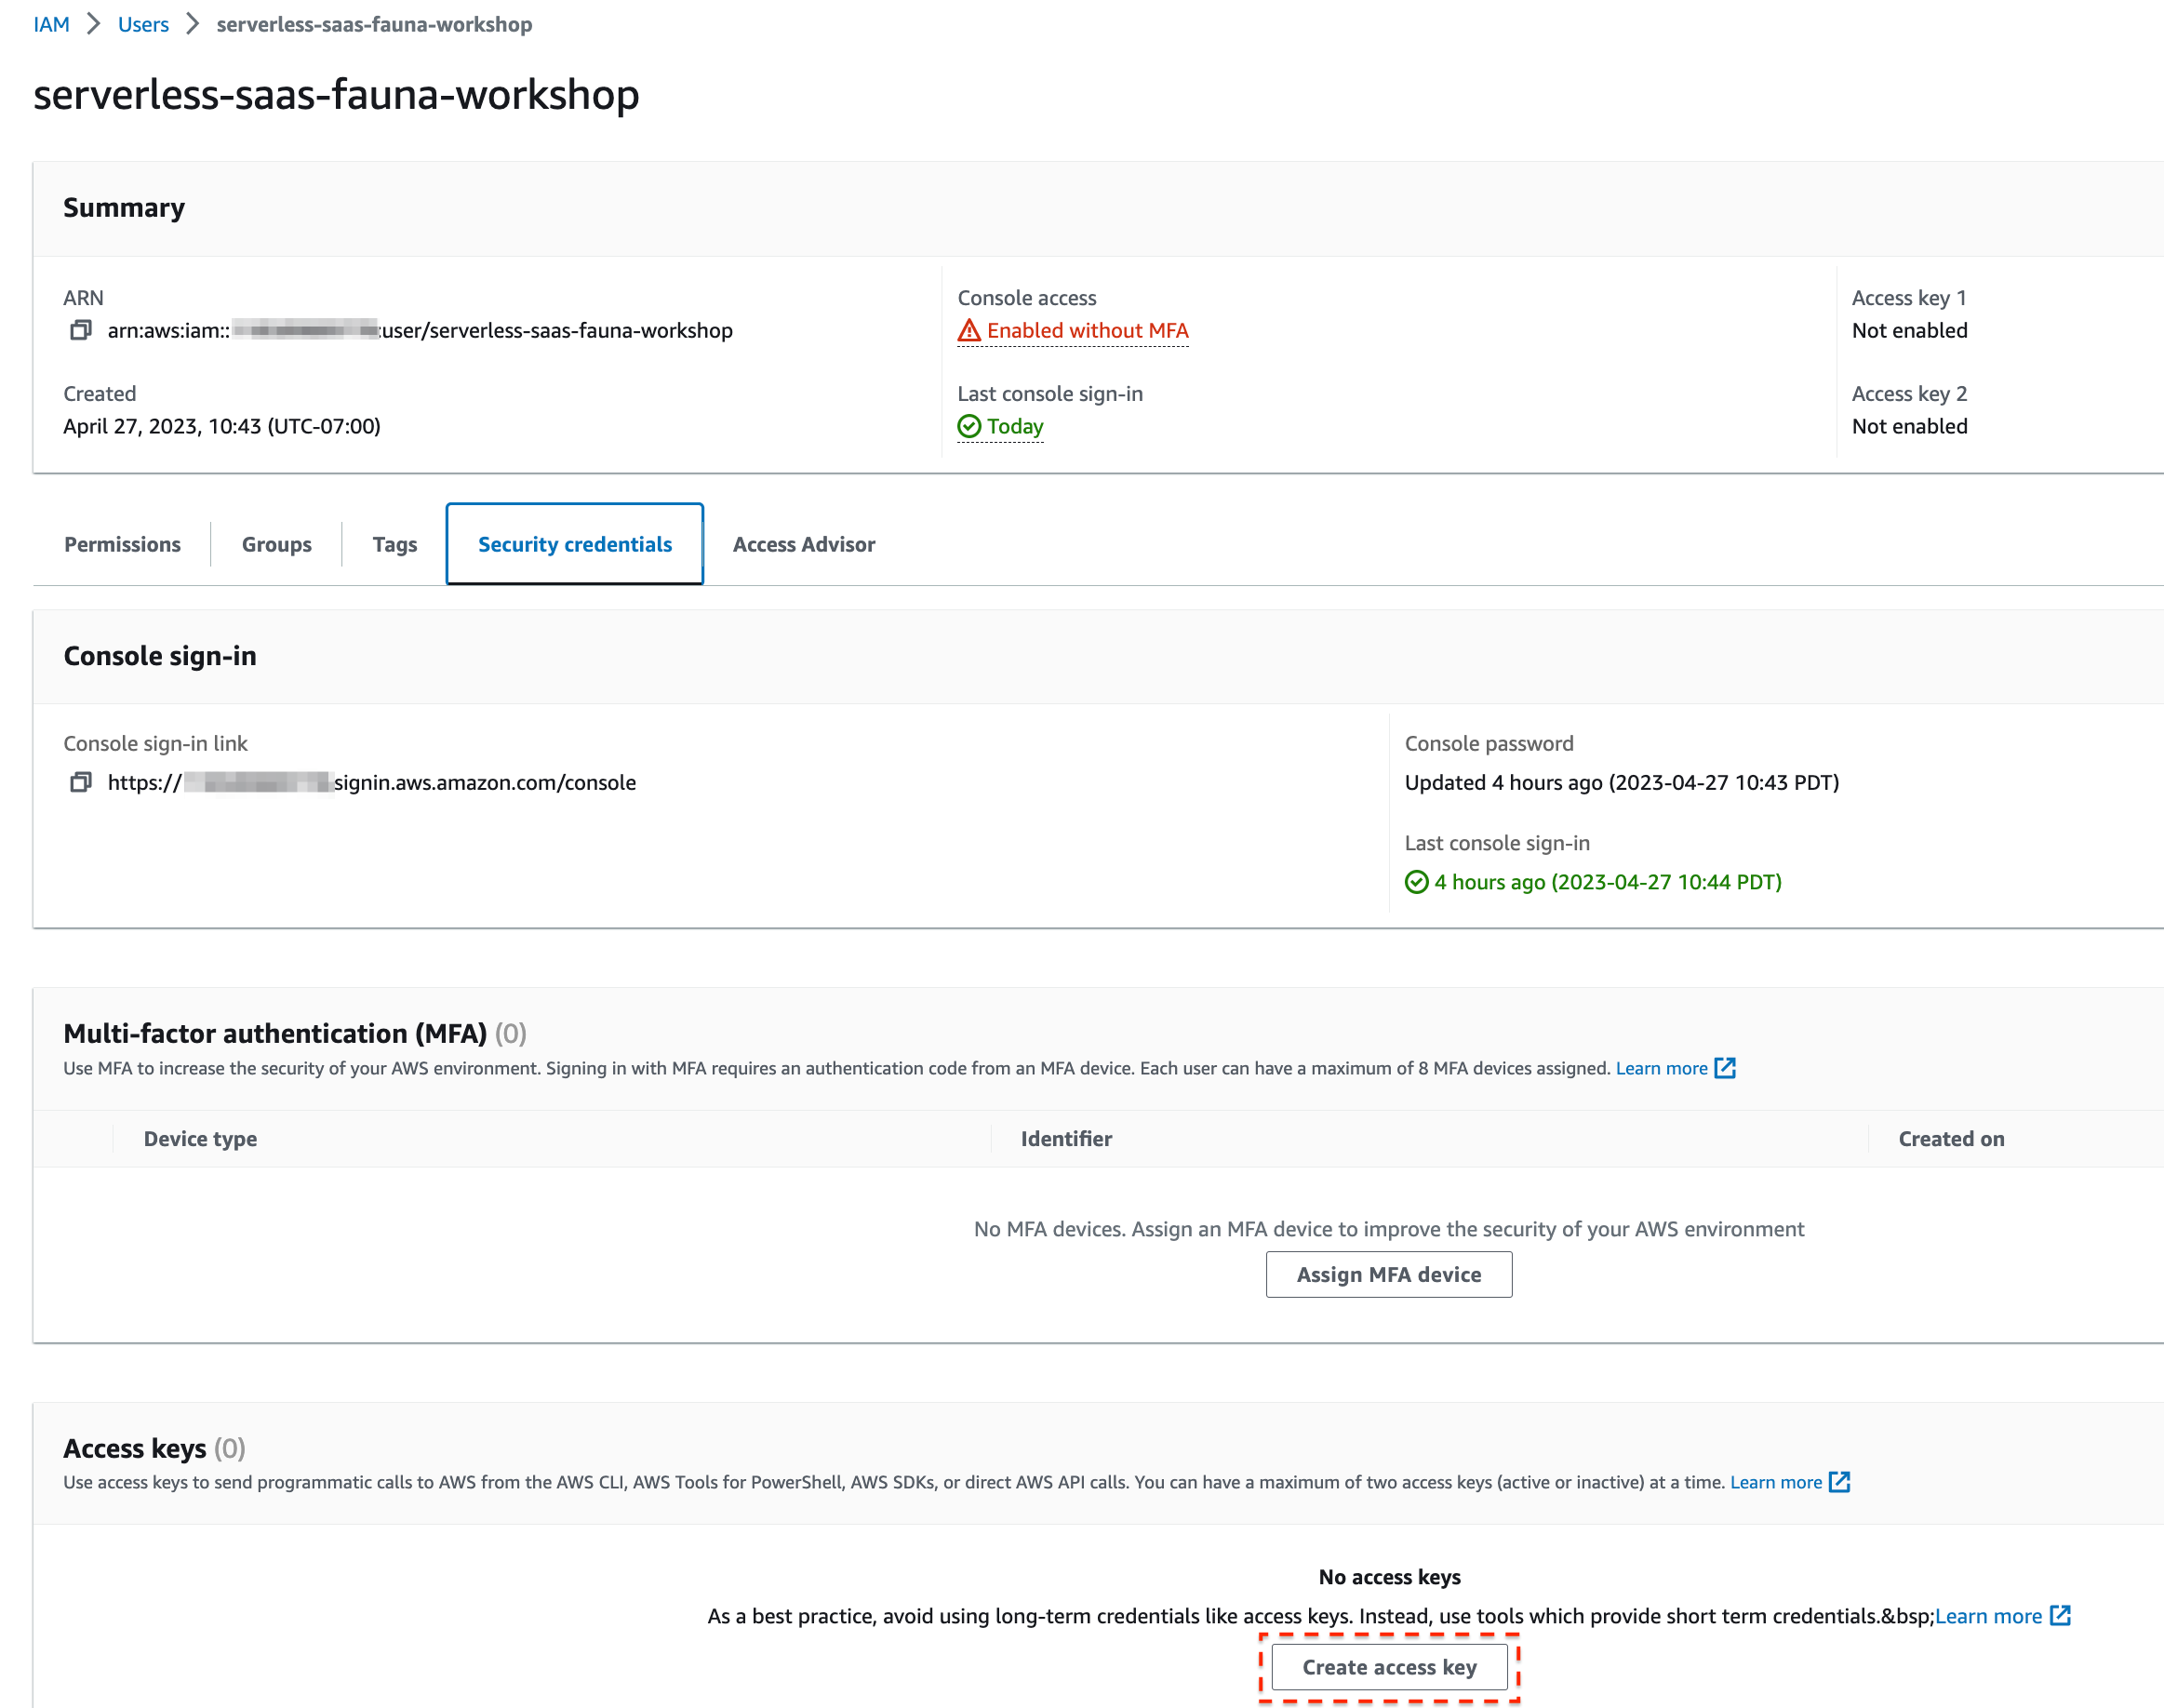
In the IAM Console, navigate to the IAM User you created earlier.
-
Create an access key for the user.
-
Navigate to the Security credentials tab and click the Create access key button

-
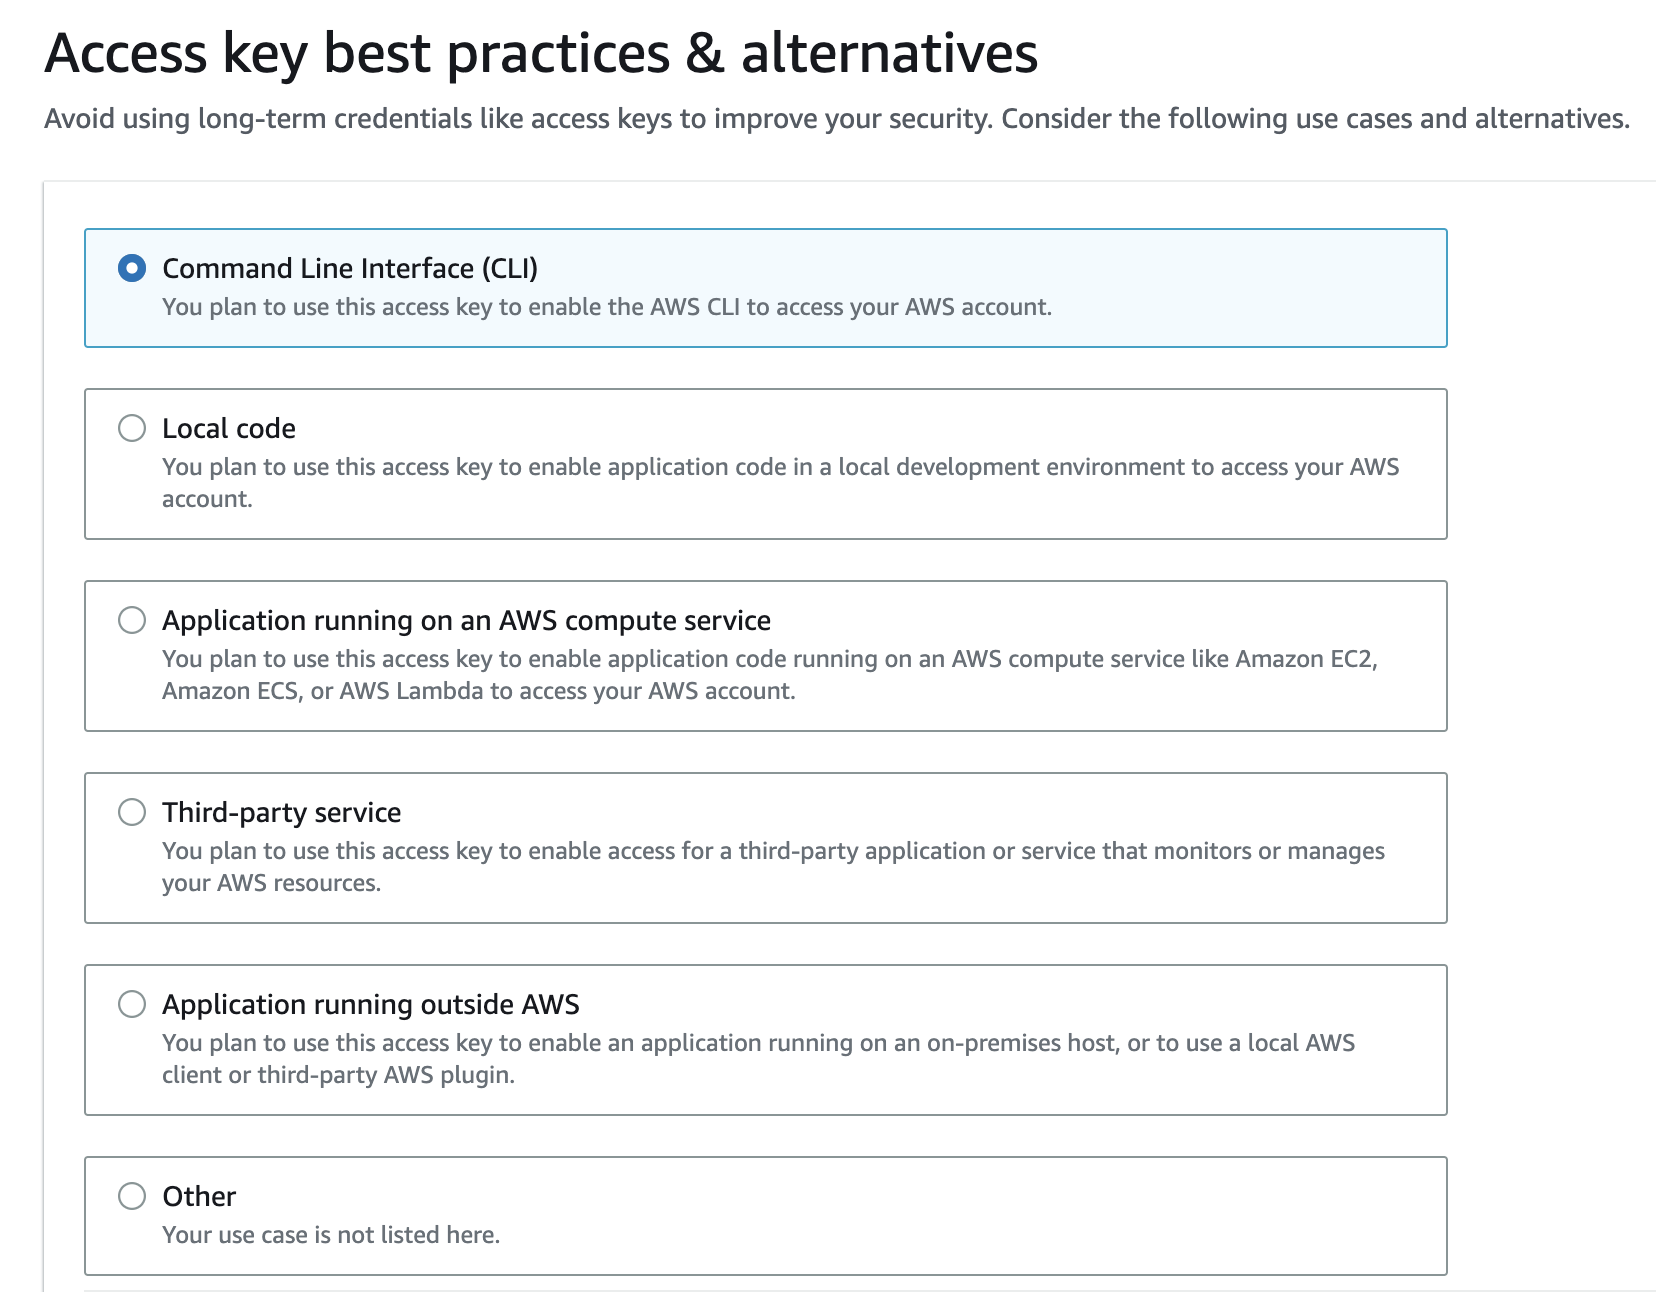
Select the Command Line Interface (CLI) radio button

-
Click through to review and save the key
-
Copy the values Access Key and Secret access key and save it somewhere temporarily. You will need it for the next step (below).

- Create a “named profile” in your AWS CLI’s credentials file with the credentials from above.
Your AWS config and credentials files are normally in the ~/.aws folder (Linux/macOS) or C:\Users\ USERNAME \.aws\ (Windows). If you’ve installed the AWS CLI, you should see them there. For more information about config and credentials file settings see AWS documentation
- Edit the credentials file by adding the following entry:
[serverless-workshop]
aws_access_key_id=<<"Access Key" from above>>
aws_secret_access_key=<<"Secret Access Key" from above>>
Clone the project
- Open up a terminal on your workstation and run the following command to clone the workshop
git clone https://github.com/fauna-labs/fauna-serverless-saas-workshop.git
cd fauna-serverless-saas-workshop
Setup the environment
-
cd into the Lab1/scripts folder
cd Lab1/scriptsRecall that during the Fauna setup, you generated an API Key for your database. This Key is to be used when instantiating a Fauna client (in the Lambda functions that implement the sample project’s APIs) to communicate with the database. We’ll also be using this key to run some scripts to setup the database with its initial schema of Collections and Indexes. In the following step, all we need to do is setup this Key in an .env file, which our deployment script will pick up and push to the appropriate resources where it is needed.
-
A template file .env.template is located in this folder. Make a copy and name it .env
-
Update the FAUNA_API_KEY variable to the value you previously saved when you generated an API Key using the web shell
-
Use the default value for STACK_NAME (this is a string prefix that AWS SAM prepends to provisioned resources)
-
Update the AWS_PROFILE variable to match the profile name you set in the AWS credentials file previously
The following shows an example .env file entries:
STACK_NAME="serverless-saas-fauna-workshop-lab1"
FAUNA_API_KEY="<The API Key from above>"
AWS_PROFILE="serverless-workshop"
-
Docker
Lastly, before you move on, ensure that you have Docker running on your machine.
Next stop: Lab1
The setup is now complete. Now, head over to Lab1 to begin the workshop.